
Patient Cohorts is a dedicated space in Cubiko where you can create and explore custom groups of patients.
Whether you're tracking a specific clinical program, supporting quality improvement activities, or following up with a group identified in another Cubiko dashboard, patient cohorts give you a reusable way to bring that group together and keep working with it.
The cohorts you create are shared across your practice, so your whole team can view and use them. Only users with access to Patient Cohorts can create cohorts or edit existing ones.
Navigate to: Clinical > Patient Cohorts
Contents
Quick guide
Patient Cohorts lets you build, save, and reuse custom groups of patients based on filters like demographics, clinical conditions, medications, billings, and appointments.
To get started:
- Navigate to Clinical > Patient Cohorts
- Choose to build from scratch (Create Cohort) or start from a template (Suggested Cohorts)
- Select your patient pool and apply filters to narrow down your patients
- Customise your table columns and generate your results
- Save your cohort
TOP TIP! You can use the cohorts in two ways:
1. Create a cohort of patients and work from that list to action.
2. Apply the cohort to metrics throughout Cubiko using the Cohort filter in your sidebar.
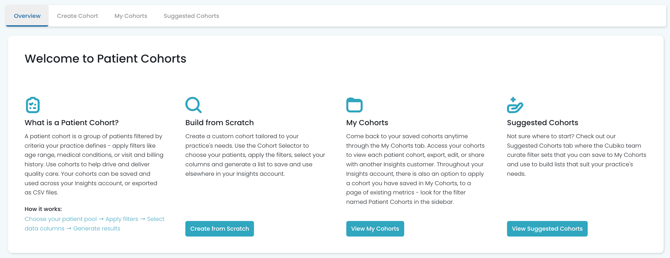
Create Cohort
The Create Cohort tab walks you through a three-step process to build a custom cohort from scratch.
Step 1 — Filter Patients: Who are you looking for?
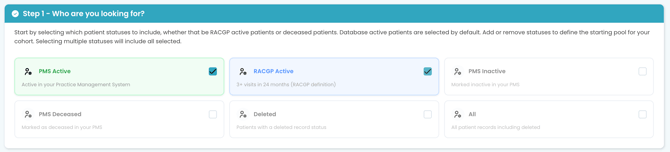
Start by selecting your patient pool — the base group of patients your cohort will draw from. Patient statuses available include:
- PMS Active — active in your Practice Management System (Default)
- RACGP Active — 3+ visits in the last 24 months (RACGP definition) (Default)
- PMS Inactive — marked inactive in your PMS
- PMS Deceased — marked as deceased in your PMS
- Deleted — patients with a deleted record status
- All — all patient records including active, inactive, deleted and deceased.
By default, PMS Active and RACGP Active are selected. You can add or remove statuses to define the starting pool for your cohort. Selecting multiple statuses will include all selected.
Click on the Next button to move to the next stage: 
NOTE: As you add filters, the Live Preview section at the bottom of the page updates automatically, showing you:
- Matching patient count
- Average appointments over 12 months
- Average billings over 12 months
- Count with a CCMP or CDM plan
- Top conditions across your filtered cohort

Step 2 — Narrow down your patients
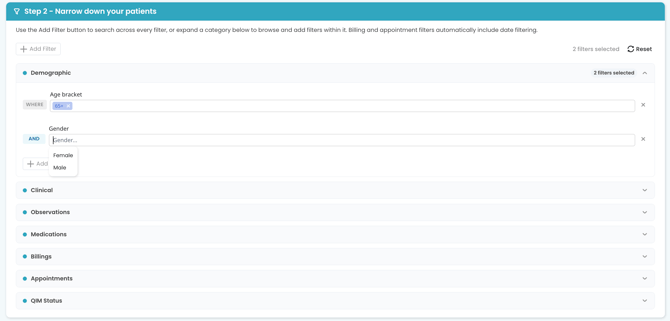
Use the filter categories to narrow your cohort further. Expand any category and select + Add Filter to browse available filters within it. You can also use the + Add Filter button at the top to search across all filter types at once.
Filter categories include:
- Demographic — e.g. age, gender, suburb
- Clinical — e.g. active conditions, clinical items
- Observations — e.g. recorded clinical measurements
- Medications — e.g. current prescriptions
- Billings — e.g. MBS items billed (includes date filtering automatically)
- Appointments — e.g. upcoming or recent appointments (includes date filtering automatically)
- QIM Status — e.g. quality improvement measure status
Click on the Next button to move to the next stage:
Step 3 — Customise your table
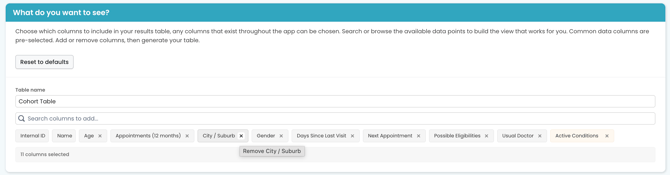
Give your table a name and then add or remove columns to build the view that works best for your team.
Choose which columns to display in your cohort results table. You can search for columns or browse available data points. Common columns are pre-selected by default, from the groupings for:
- Demographics
- Patient and Practice IDs
- Patient Status
- Doctor Assignments
- Appointments
- Insurance and Medicare
- Concession Cards
- Medical Conditions
- Clinical Observations
- Medications
- Vaccinations
- Care Plans and Reviews
- Service Eligibilities
- Health Assessments
- Reminders
- Billing History
- Calculated fields
Click on the Generate Table button to move to the next stage:
Step 4 - Generate Table: Your cohort results
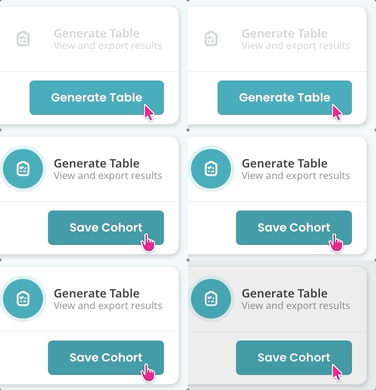
Your results table displays all matching patients with the columns you selected, allowing you to preview before saving.
To save your cohort, select Save cohort, give it a name and an optional description, then select Save cohort. Your applied filters are shown so you can confirm what's been captured.
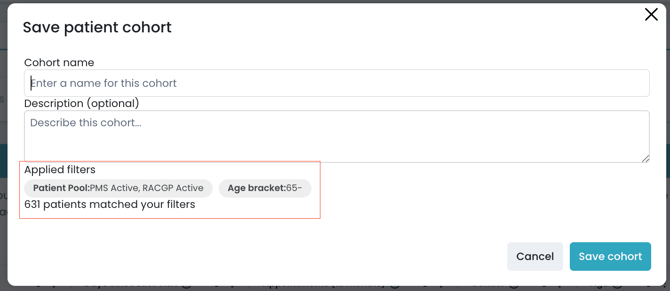
Once you have saved the cohort, you can begin to action this list from the My Cohorts tab.
NOTE: Saving a cohort captures the filter criteria — not a static list of patients. Each time you apply a saved cohort, it reflects your current patient data.
My Cohorts
The My Cohorts tab is where all saved cohorts for your practice are stored. Cohorts are shared across your practice, so the whole team can see and use them.
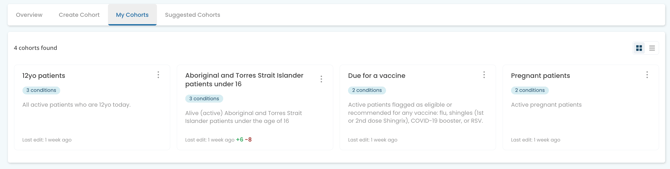
Each cohort card shows:
- Cohort name and description
- Number of conditions applied
- Last edited date
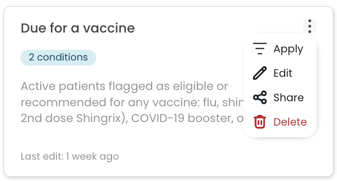
- Apply — apply the cohort as a filter across Cubiko dashboards and metrics
- Edit — update the cohort's filters, columns, or name
- Share — share the cohort. Share the generated link to share the cohort with other Cubiko practices. This might include if you have multiple locations, or you may want to share it with a friend who uses Cubiko at their practice.
- Delete — permanently remove the cohort from the whole practice (this removes all viewers' access to this cohort at your practice)
NOTE: Patient cohorts use clinical data. For all team members to be able to view the data in these cohorts, a practice admin will need to enable clinical data access for them. More information here: Patient Contacts.
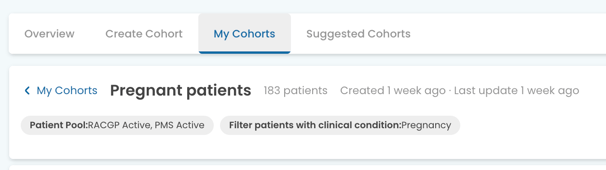
Open a cohort to see the filters and the patient list:
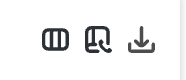
Use the table filters to:
- Add/remove columns in your table
- Download patient contact details such as phone number and email address
- Export to CSV for use outside Cubiko
For more information on filters, please review the knowledge base article: Cubiko Filters
Suggested Cohorts
The Suggested Cohorts tab contains Cubiko templates that give you a set of pre-built starting points, organised by category:
- Clinical — e.g. Aboriginal and Torres Strait Islander patients under 16
- Billing & MBS — e.g. DVA card patients
- Preventive Care — e.g. Due for a vaccine
Click on the cohort and save to your cohorts. Once saved, you can edit and adjust as needed to customise your cohort.
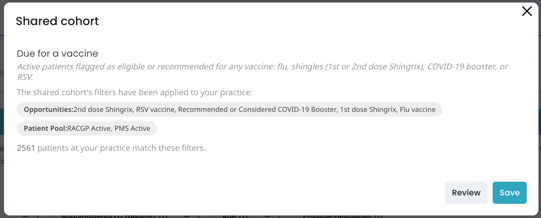
NOTE: Suggested templates are created and maintained by Cubiko.
Applying a cohort across Cubiko as a filter
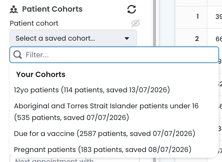
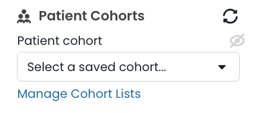
Once you've saved a cohort, you can apply it as a filter across Cubiko. Look for the Patient Cohorts filter panel — select a saved cohort from the dropdown to filter the page's metrics and data to that patient group only.
This means you can use a cohort you've built in Patient Cohorts to explore that group's data in any relevant Cubiko dashboard.
Some examples:
-
Filtering the Quality Improvement metrics to only show results for your DVA card patients
-
Viewing appointment data for your RACF cohort
-
Applying an age, gender, medication, and/or condition cohort to your Possible CCMP patients in Item Optimisation.
Select Manage Cohort Lists beneath the dropdown to go directly to the My Cohorts tab at any time.
TOP TIP! Build a cohort once, then use it everywhere. Create a cohort, then apply it across dashboards to track care gaps, billings, appointments, and QI activities — all for that specific group.