
The latest table enhancement brings a whole new level of customisation, flexibility, and control to your Cubiko dashboard. With these enhancements, you can tailor your table views to suit your unique needs, making it easier than ever to filter, organise, and extract actionable insights from your data.
Whether you’re pinpointing specific patient cohorts or streamlining data analysis for team decision-making, these new tools empower you to take charge of your information. From advanced column filtering to drag-and-drop reordering, let’s dive into what’s new and how you can make the most of these updates.
The key areas covered in this article are:
Overview of New Table Features
Here’s a quick summary of what’s included in the new table enhancements:
- Select Columns to Display: Tick the column titles you want to display and untick those you wish to hide.
- Advanced Column Filters/Search function: Combine filters across multiple columns to create highly specific views.
- Actionable Columns: Use this column to track actions for each row in the table. Actions are shared between all viewers at this practice.
- Multiple Column Sorting: Sort data by more than one column for layered insights.
- Customisable Column Views: Pin or hide columns to focus on the data that matters most to you.
- Drag-and-Drop Columns: Easily reorder and/or remove columns to match your workflow.
- Copy & Paste: Copy rows/ cells, or custom drag and select information you wish to copy.
- Row Checklist Options in Quickcheck: Quickly select unchecked rows.
- Adjustable Page Size: Choose how many rows you want to see per page.
- Reset Button: Return the table to its default state with a single click.
- Printing Tables: Print tables with a structured format that includes the Cubiko logo, table title, tooltip contents, data's last updated timestamp, date range, and a disclaimer for clinical decision-making.
- Enhanced Excel Exports: More information provided, including Table Title, tooltips, disclaimers and timestamps.
- Persistent Columns: Customisation will 'stick', meaning you can leave the page, log out and return, and your customisation you have set will still apply.
How to Use Each Feature
Select Columns to Display
- Click the "Columns" option located in the table header

- Tick the column titles you want to display and untick those you wish to hide.

- This feature allows you to declutter your view and focus only on the most relevant data for your analysis.
.gif?width=670&height=267&name=Large%20GIF%20(1746x696).gif)
- To reset, use the reset button on top of the table OR the reset button inside the column.


Advanced Column Filters/Search function
- Navigate to any table and locate the filter icon
 in the column header.
 - Click the icon and enter your desired criteria using the drop-down options (contains, does not contain, equals, does not equal, begins with, ends with, blank, not blank) and type in the custom filter you wish to apply.
- Combine filters across columns to narrow down data further, such as filtering for patients with no appointments and no flu vaccination this season.
-2.gif?width=670&height=267&name=Large%20GIF%20(1746x696)-2.gif)
- The icon will highlight when filters are applied to a column

- To reset use the reset button on the table OR
- to remove a single filter click the icon and click reset.

Actionable Columns:
You will see an ‘Actions’ column at the far right of every table in Cubiko. This column lets you quickly track actions for each row within the table. This allows for team transparency when enquiring with patients/practitioners, and avoids doubling up work by different team members.
This feature will be available on all tables within Cubiko Insights. The key areas where this feature will be useful are Clinic Insights, Billing Optimisation and Item Optimisation cabinets, Quality Improvement, and CPD activities.

You can also drag the 'Actions' column to your preferred spot or hide it entirely; Cubiko will remember your settings each time you return.
TOP TIP: Hover over any action to see who last updated it and when, making team collaboration even easier.
Multiple Column Sorting
- Click on the column header to sort by that column.
- Click additional columns to apply multi-layered sorting.
- Example below: Sort the list by billing eligibility to group together, then payer by service date.
-3.gif?width=670&height=267&name=Large%20GIF%20(1746x696)-3.gif)
Customisable Column Views
- Use the column menu (accessible via the three-dot "kebab" menu) to pin or hide specific columns.
- Pin columns to keep them visible as you scroll horizontally.
- Hidden columns can be restored from the same menu.
-4.gif?width=670&height=267&name=Large%20GIF%20(1746x696)-4.gif)
Drag-and-Drop Reordering
- Click and hold the column header, then drag it to your preferred position.
- Release the header to place it in the new location.
- If you drag the column off the table, it will hide this column. To get it back, simply use the Select Columns to Display steps to re-tick it to reappear.
-Jan-29-2025-01-38-27-4114-AM.gif?width=670&height=267&name=Large%20GIF%20(1746x696)-Jan-29-2025-01-38-27-4114-AM.gif)
Copy & Paste
- Click and drag across multiple cells to multi-select information.
.png?width=640&height=504&name=image%20(1).png)
- Copy and paste rows by right-clicking on cells/ rows, allowing information to be copied and pasted out of the table.

Row Checklist Options in QuickCheck
- Tick rows directly in the table to select patients
- Select the top 100 unchecked rows in one click
- Find out more about using Quickcheck here.


Adjustable Page Size
- Use the page size selector at the bottom of the table to choose how many rows to display (e.g., 10, 25, or 50 rows per page).

Reset Button
- At any point, click the Reset Table button to return the view to its default settings.
Printing tables
- Print patient eligibility lists and other actionable tables (e.g., QI, CPD, historical billing) in a structured format. Print via the print preview

- Filters that are applied on the page
- Tooltips on the page
- Disclaimer at the footer
- Data last updated timestamp
- Cubiko logo
- Link to the page being printed
- Disclaimer:
"This report has been generated using Cubiko reporting tools, and Cubiko excludes all liability for any unauthorised disclosure of this report. The recipient of this report should not rely upon its contents when making clinical decisions and acknowledges Cubiko does not warrant that the contents of this report will be suitable for the purpose intended by you.
Enhanced Excel export:
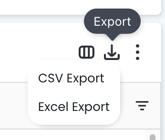
- Excel downloads will include the Table Title, tooltips and disclaimers. This provides complete context and makes it easier to replicate reports. The report will also provide a timestamp of when it was exported.

Persistent Columns
- After tables have been customised, they will remain set until the reset button has been pressed. This applies to all per tables, per Cubiko User. Meaning you can leave the page, or log out and return, and customisation will still apply.
Top Tips
- Use the "Pin" feature for columns you frequently reference to keep key data always in view.
- Combine advanced filters and multi-column sorting to create targeted datasets.
- Reset the table before starting a new analysis for a clean slate.
FAQs
Q: Can I save my custom table view?
A: Although currently, there isn't an option to 'save' custom table filters, the Custom table filters you have selected are 'sticky' and will still be applied if you leave the page and return.
Q: Are these features available on all Cubiko tables?
A: Yes. This feature will be available on all tables within Cubiko Insights.
Q: Can I export filtered data?
A: Absolutely! You can export your customised view by clicking the "Export" button in the table menu.