
The sections in this article include:
Important: You must complete your Account Configuration first before configuring practitioners in Calculate. Please refer to our Knowledge Base Article on Configuring your Calculate Account.
Creating a practitioner
To configure a practitioner in Calculate:
-
Navigate to Practitioners on the left hand side within Calculate.
-
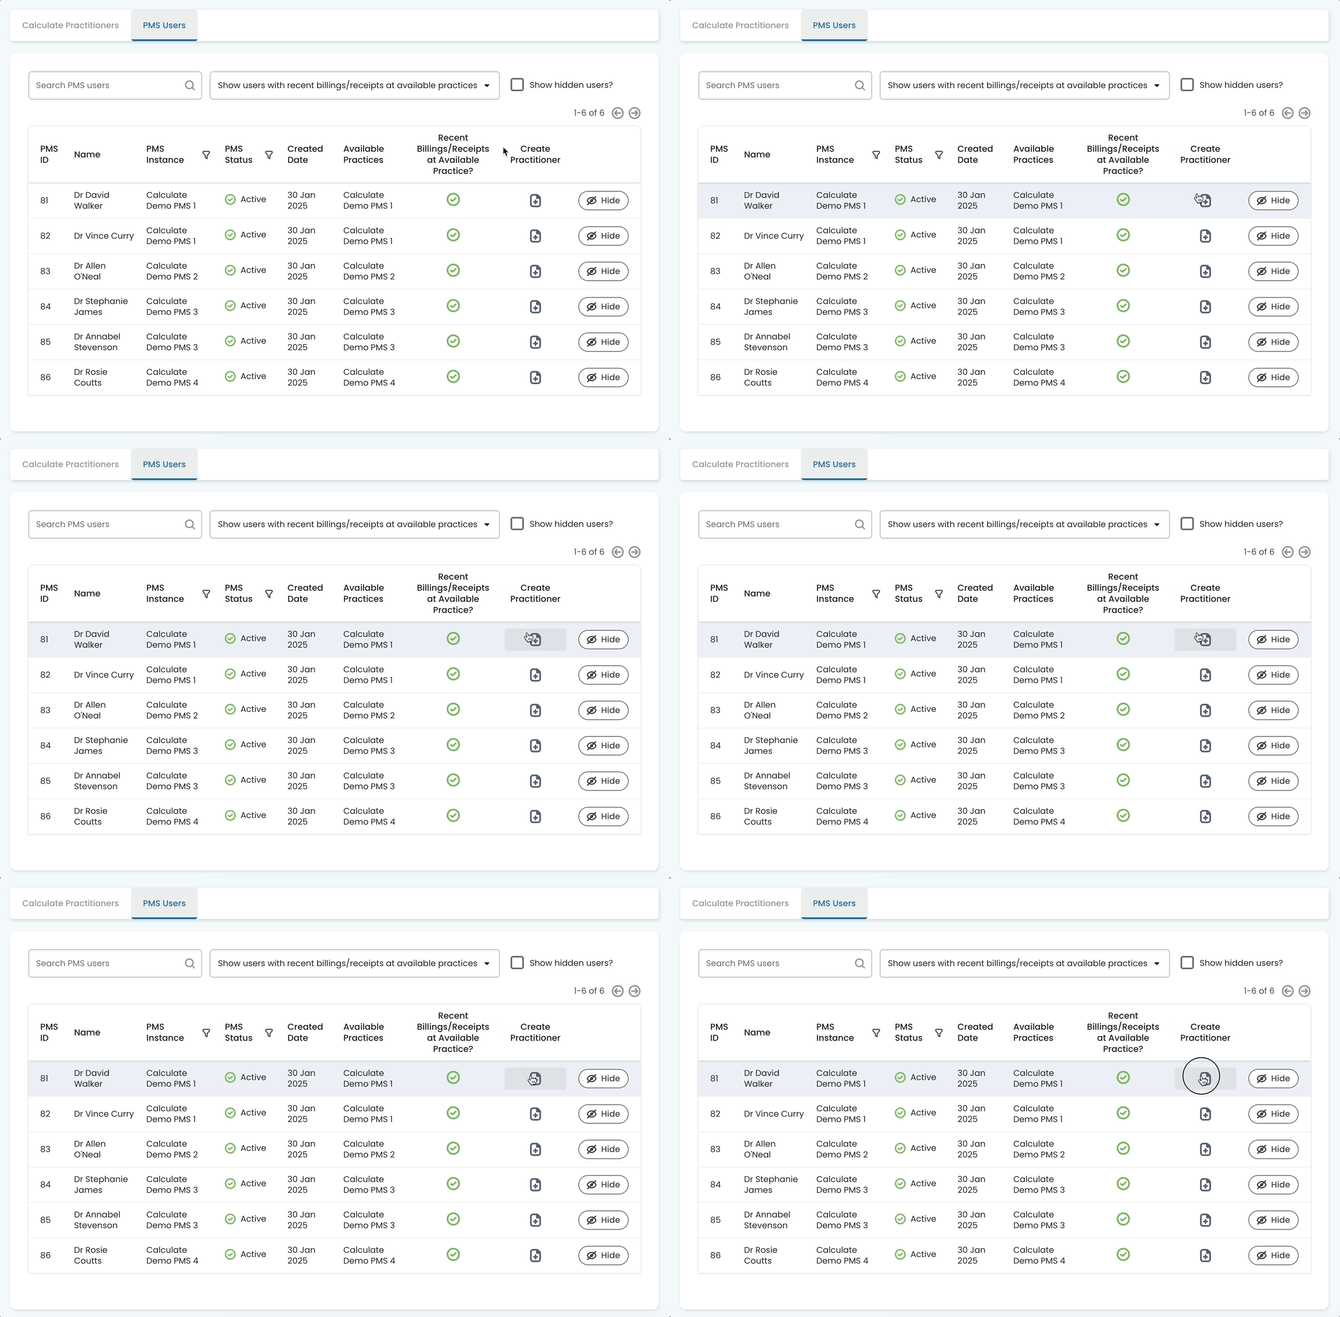
Go to the PMS Users tab.
-
Select the Create Practitioner icon within the table.
-
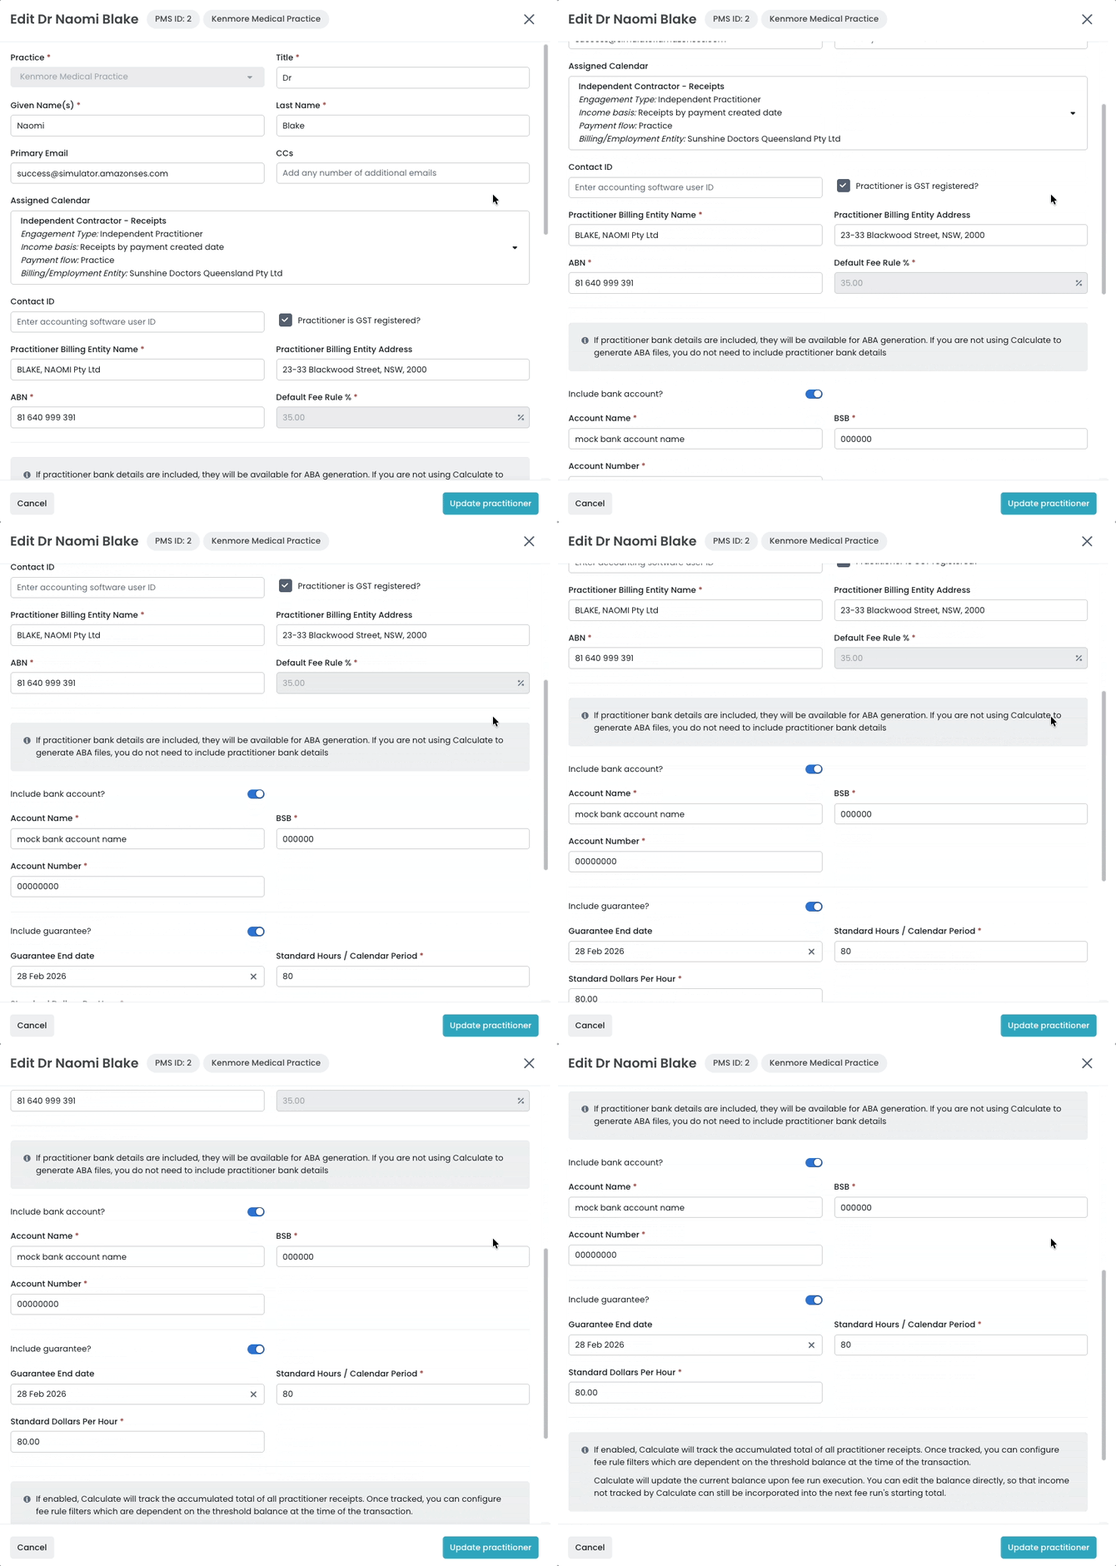
Enter the required details:
-
Select Practice from the drop-down options available.
-
for more information on how to set up a practitioner across multiple locations please refer to “Configuring a practitioner across multiple practices”
-
-

-
-
Title, First Name, Last Name
-
Practitioner email: The primary email for the practitioner
-
CCs: Add additional email addresses, such as the practitioner’s bookkeeper or accountant, if required
-
Assigned Calendar: Choose the correct calendar that this practitioner belongs to.
-
Contact ID: Enter the accounting software user ID. This is optional.
-
GST Registered: Select this if the practitioner is GST registered
-
Practitioner Billing Entity Name
-
Practitioner Billing Entity Address
-
ABN: Enter the practitioner’s billing entity ABN
-
Default Fee Rule %: The base percentage split for this practitioner. If no other rules are set, this default fee rule % will apply as a catch-all.
-
Bank Account: Add Account Name, BSB, and Account Number.
-
Note: If bank details are included, the practitioner can be added to ABA file generation. If you are not using Calculate to generate ABA files, bank details are not required.
-
-
Guarantee: If a guarantee applies for this practitioner, enter Guarantee End Date, Standard Hours per calendar period, and Standard Dollars per Hour. For employed practitioners, complete the end date, standard hours and the standard dollar amount per hour.
-
Track balance for thresholds: If enabled, Calculate will track the practitioner’s accumulated billings or receipts, allowing threshold-based fee rule filters to be applied once a threshold amount is reached.
-
Balance reset: Select when the threshold balance resets. Options include:
-
Each fee run period: make this selection when a practitioner’s threshold resets each Fee Run period
-
Financial year: make this selection when a practitioner’s threshold resets at the end of each financial year (1 July - 30 Jun)
-
Custom date: Select this option to reset the threshold annually on a contract-specific date. Enter the final date of the contract year.
-
-
Opening balance: The billings or receipts total carried into the next fee run and used as the starting point for threshold calculations.
-
Example: A practitioner has a reduced service fee percentage after some amount of billings/receipts in the financial year. It is likely that the practitioner has accrued billings/receipts from the start of the financial year up until the start of their first fee run. When setting this threshold up in Calculate, this accrued amount can be entered into the opening balance.
-
The opening balance will also be relevant for new Calculate customers or exisiting customers setting up practitioners threshold agreements for the first time. The opening balance entered should always reflect the billings or receipts for the period from the start of the threshold period until the start of the first calendar the practitioner is included on after starting to track threshold balances.
-
No opening balance is required for Fee run period thresholds as the balance will be calculate and rest each period.
-
-
-
Finding the right PMS user
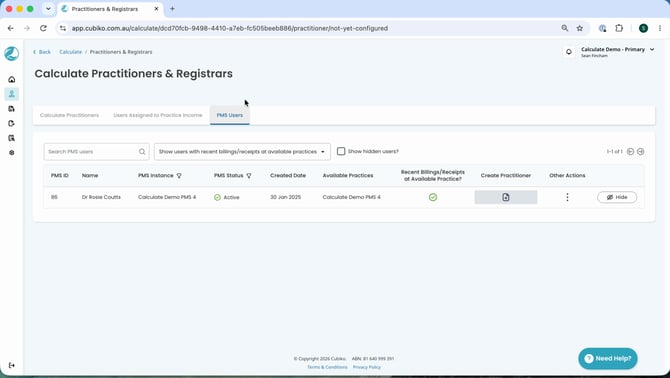
The PMS Users tab is filtered by default to Show users with recent billings/receipts at available practices, so only PMS users with billing or receipt activity in the last fortnight appear.
If a new practitioner is not showing, for example because they have been set up in Best Practice but haven’t billed yet, use the drop-down filter and select Show all users to see every PMS user extracted from your database.
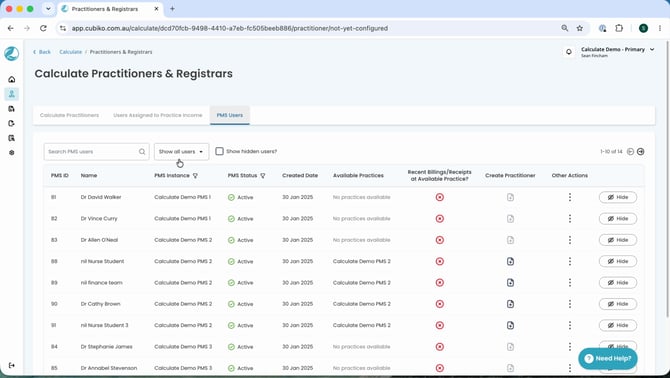
TOP TIP: Set a new practitioner up as soon as they have been added in Best Practice, even before their first bill. Switching to Show all users lets you find and configure them in advance, so they’re ready in time for their first fee run.
Note: Calculate extracts PMS users from your database automatically each morning at around 4am, at the same time as the automated fee run data extraction. To trigger an extraction sooner, go to Settings > Practices > PMS Instances.
Each PMS user row also has a Hide button. Hiding a PMS user removes them from the table unless the Show hidden users? checkbox is selected.
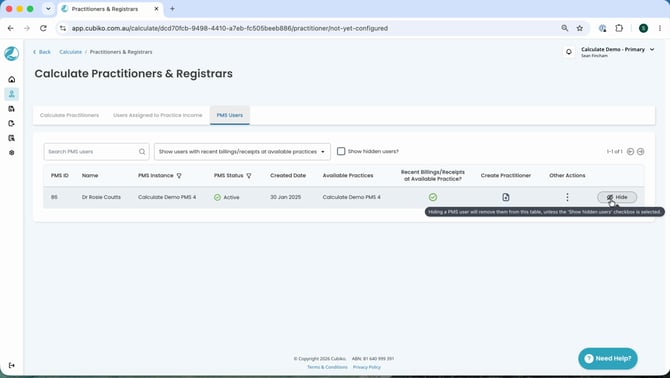
Note: Only hide a PMS user ID if you’re sure it shouldn’t be included in fee runs and shouldn’t be assigned to practice income.
Other actions for PMS users
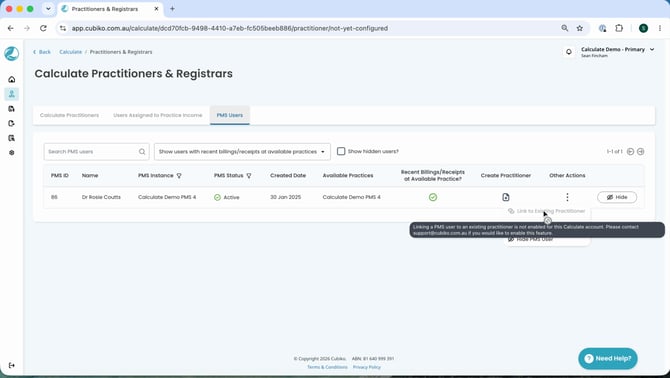
Selecting the ⋮ icon under Other Actions for a PMS user opens two further options:
-
Link to Existing Practitioner: connects a PMS user directly to a practitioner already configured in Calculate, instead of creating a new one. This must be enabled for your account. If it is greyed out, submit a Support request to have it turned on.
-
Assign to Practice Income: attaches a PMS user’s income to the practice rather than to a practitioner. For a detailed overview of this, please refer to our Knowledge Base article Practice Income.
Configuring a practitioner across multiple practices
If a practitioner works across more than one practice in the same PMS database, they must be configured separately for each practice.
For example, If Dr Jane Doe works at Practice 1 and Practice 2:
-
Configure Dr Jane Doe at Practice 1, following the steps outlined above.
-
Once Dr Jane Doe has been configured for Practice 1, return to the Not Yet Configured PMS Users tab to repeat the process for Practice 2.
Next step: Now that your practitioners are configured, the next step is to set up their Fee Rules. Please refer to our Knowledge Base Article for more information on Setting Up Fee Rules. Once fee rules are in place, you’ll be ready to run your first fee run.